# Element 3D v1.5

***

## FEATURES

* Animated OBJ Sequences Support
* Built-In Glow Rendering
* Custom Anchor Point Control
* New Particle Distribution Ordering & Repeating Options
* Ambient Occlusion weighting per material
* Multi-Sampled Ambient Occlusion
* Taper Fog Mode
* New Layer Grid Array Mode
* New Draft Modes
* Improved 3D Extrusion
* Multi-User Installer Support
* Better Multiprocessor Rendering Support
* UI tweaks
* Several bug fixes

## WATCH NEW FEATURES VIDEO

<table data-view="cards"><thead><tr><th data-hidden data-card-cover data-type="image">Cover image</th><th data-hidden data-card-target data-type="content-ref"></th></tr></thead><tbody><tr><td><a href="https://2307539615-files.gitbook.io/~/files/v0/b/gitbook-x-prod.appspot.com/o/spaces%2FVXPIT6wWK7VeTYMAHNYe%2Fuploads%2FLL658eMcX8ajvA88Srv2%2Fupdate.jpg?alt=media&#x26;token=a3548349-b395-4138-8d49-1efd0c03b6ab">update.jpg</a></td><td><a href="https://www.videocopilot.net/help/element/tutorial/basic/element_1_5_new_features/">https://www.videocopilot.net/help/element/tutorial/basic/element_1_5_new_features/</a></td></tr></tbody></table>

### Importing OBJ Sequences

In the Element Scene interface you can go to File/Import 3D Sequence and you can navigate to where your sequence is saved.

<figure><img src="https://2307539615-files.gitbook.io/~/files/v0/b/gitbook-x-prod.appspot.com/o/spaces%2FVXPIT6wWK7VeTYMAHNYe%2Fuploads%2F7lvCl5eWKIezkMAeHIpT%2Fimport_3d_sequence.jpg?alt=media&#x26;token=f5c95d90-9774-4a44-a55e-904aba36f141" alt=""><figcaption></figcaption></figure>

Select the first obj in the sequence and select open.

<figure><img src="https://2307539615-files.gitbook.io/~/files/v0/b/gitbook-x-prod.appspot.com/o/spaces%2FVXPIT6wWK7VeTYMAHNYe%2Fuploads%2FBT6x8esnJhmKKdFhh3sL%2Fsequence_select.jpg?alt=media&#x26;token=9d9d7812-b973-423e-aef2-6751a90d9fa1" alt=""><figcaption></figcaption></figure>

The whole sequence should be import and the amount of frames that will play is indicated by the number next to the model name.

<figure><img src="https://2307539615-files.gitbook.io/~/files/v0/b/gitbook-x-prod.appspot.com/o/spaces%2FVXPIT6wWK7VeTYMAHNYe%2Fuploads%2FvAkfX6Ujchp4mpI4vSl8%2Fsequence_imported.jpg?alt=media&#x26;token=653568d9-4341-43c7-9506-2103d154c40c" alt=""><figcaption></figcaption></figure>

You can control the in and out points with the Start Frame and End Frame Option. Use the Frame offset to shift the animation forward or backward in time. Increase or decrease the speed at which the animation plays at with the Playback Speed, slower speeds may play choppy due to lack of model data to interpolate.

<figure><img src="https://2307539615-files.gitbook.io/~/files/v0/b/gitbook-x-prod.appspot.com/o/spaces%2FVXPIT6wWK7VeTYMAHNYe%2Fuploads%2FRLAcGrYUGxkFvSJ1tN6g%2Fframe_offset.jpg?alt=media&#x26;token=f487990a-9a3a-4618-9cda-c9a995f26946" alt=""><figcaption></figcaption></figure>

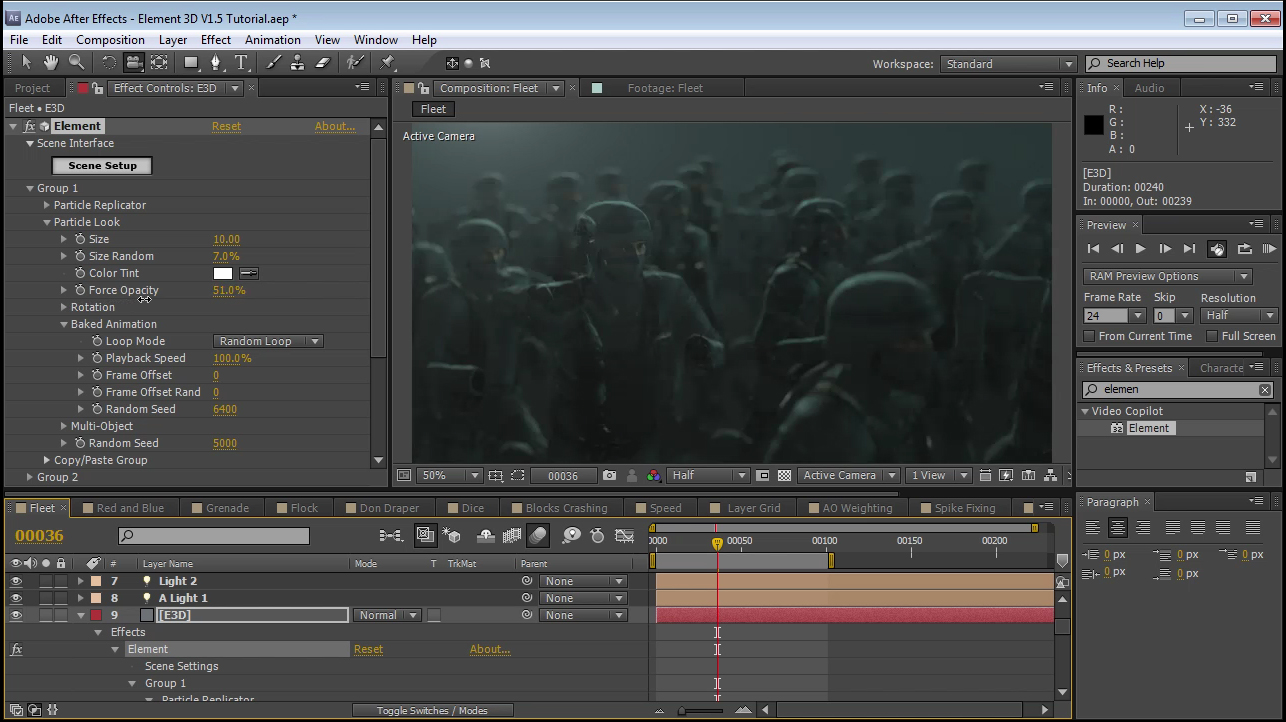
### Baked animation options in the Element effects panel

Loop mode: Options for how the animation plays back

<figure><img src="https://2307539615-files.gitbook.io/~/files/v0/b/gitbook-x-prod.appspot.com/o/spaces%2FVXPIT6wWK7VeTYMAHNYe%2Fuploads%2FphFGnkN9D0n0V4IbG9Vf%2Floop_modes.jpg?alt=media&#x26;token=6b822f24-139b-4378-9a46-b258021e899b" alt=""><figcaption></figcaption></figure>

-Loop: Animation plays back continuously from beginning to end repeatedly\
-Random Loop: Picks random point in time to start from and play from beginning to end continuously\
-Freeze at end: Plays animation once\
-Mirror: Plays forward then reverse continuously

### Glow

Select Enable to turn on\
Glow From Illumination: Glows from an illumination map and settings from the scene interface.\
Glow From Luminance: Adds glow to all bright parts of the image

<figure><img src="https://2307539615-files.gitbook.io/~/files/v0/b/gitbook-x-prod.appspot.com/o/spaces%2FVXPIT6wWK7VeTYMAHNYe%2Fuploads%2FYEGqsubUig873kMKAtn6%2Fglow_from.jpg?alt=media&#x26;token=5b773b17-f556-444c-86ac-87b1e3ed6a8c" alt=""><figcaption></figcaption></figure>

Chromatic Diffraction: Creates an additional a glow with some color bleed similar to chromatic aberration.

<figure><img src="https://2307539615-files.gitbook.io/~/files/v0/b/gitbook-x-prod.appspot.com/o/spaces%2FVXPIT6wWK7VeTYMAHNYe%2Fuploads%2F7laiDoIB8JjX334z2lxw%2Fchromatic_diffraction.jpg?alt=media&#x26;token=8b0e7723-c568-4626-804a-132348dc1adf" alt=""><figcaption></figcaption></figure>

Material setting: Glow Amount: choose how much this material reacts to the main glow settings.

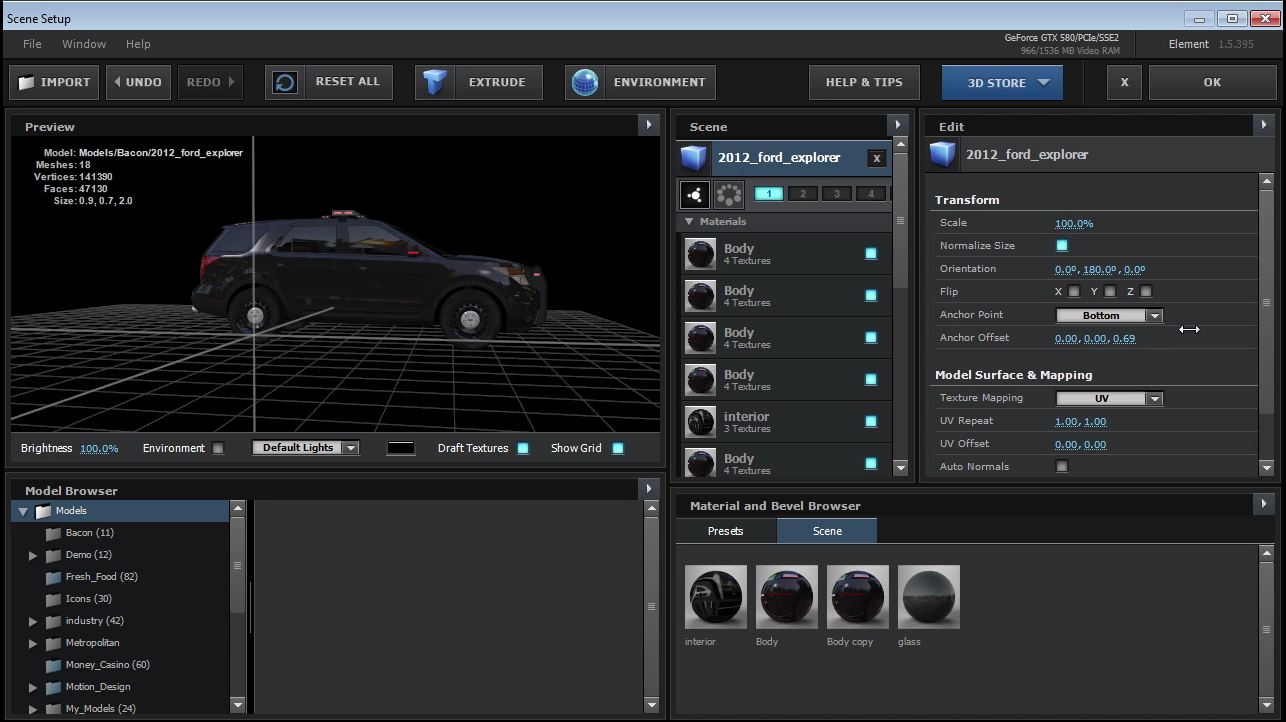
### Custom Anchor point Position

On the viewpoint options bar check the Show Grid which will show where the anchor point is located.\
If you click on the Model name, the model options will show up and you can use the Anchor Offset options to manually adjust the anchor point position.

<figure><img src="https://2307539615-files.gitbook.io/~/files/v0/b/gitbook-x-prod.appspot.com/o/spaces%2FVXPIT6wWK7VeTYMAHNYe%2Fuploads%2FGsp3ML4Q5LEgJqXKPCKO%2Fcustom_anchorpoints.jpg?alt=media&#x26;token=ddb97c07-8b8e-4ad7-be22-59cf2c006ffe" alt=""><figcaption></figcaption></figure>

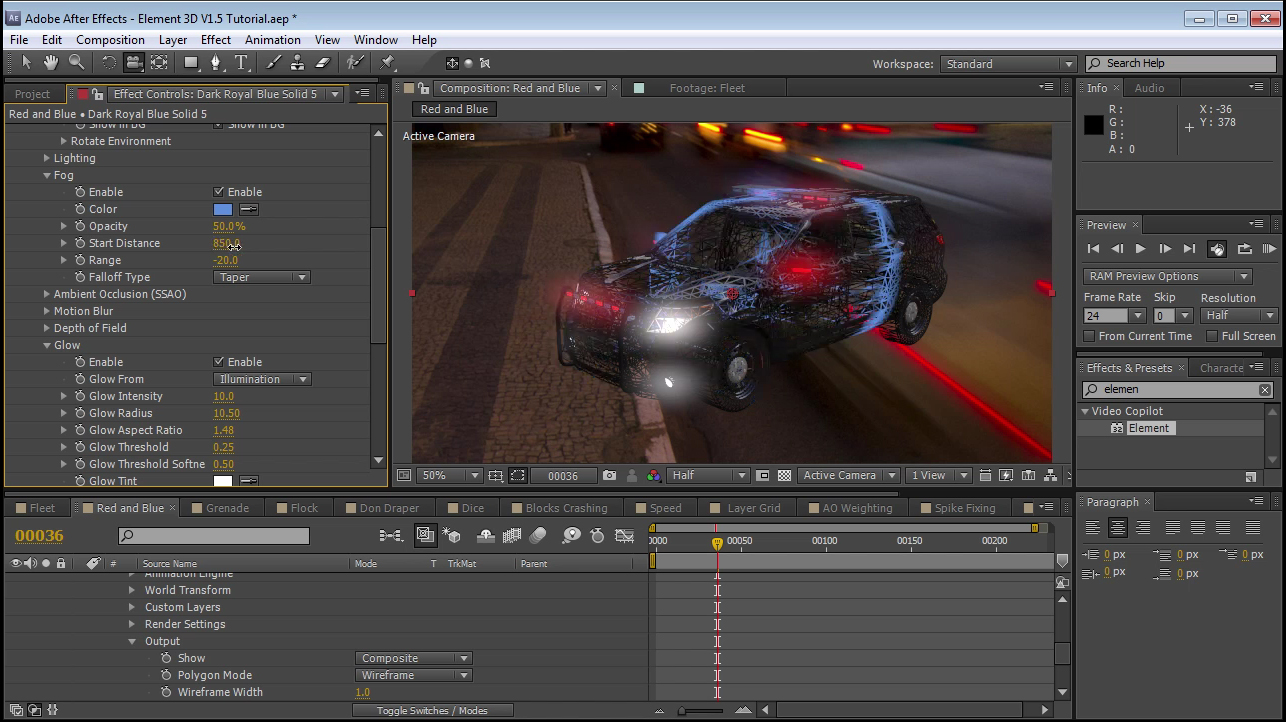
Fog Taper: Create a thinner fog radius for a scan-like look. (screen shot also has model set to wireframe)
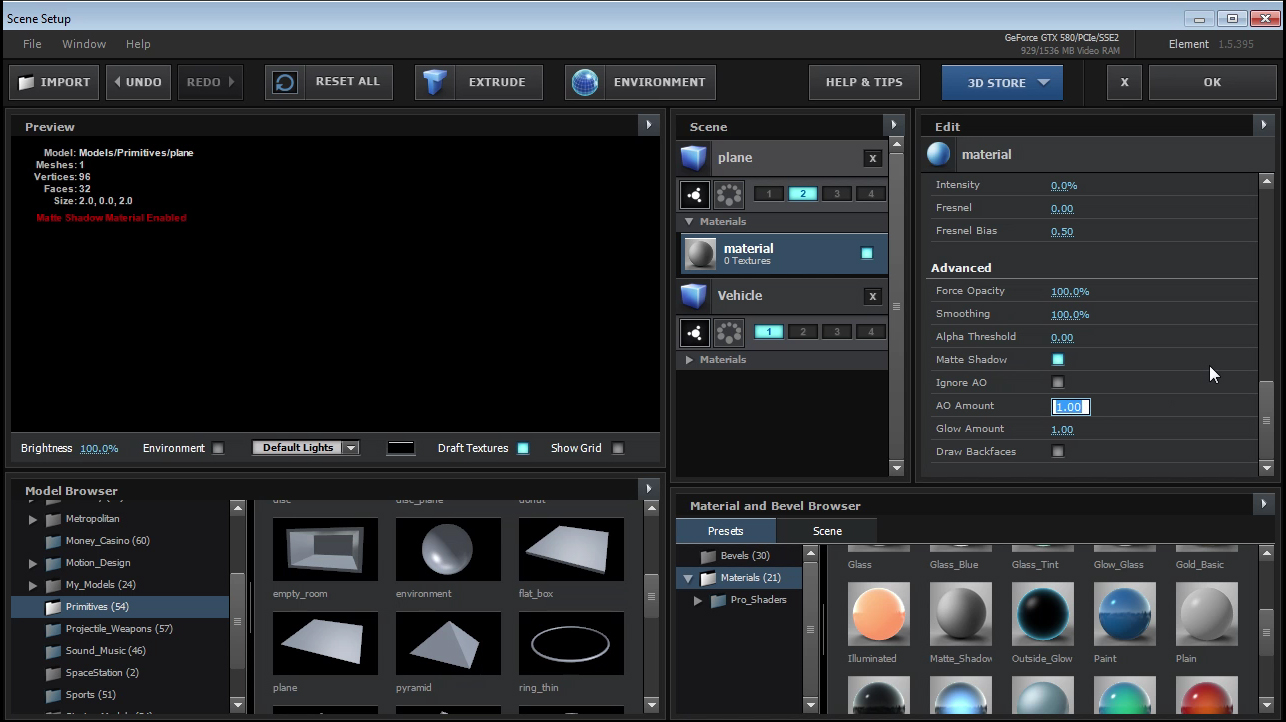
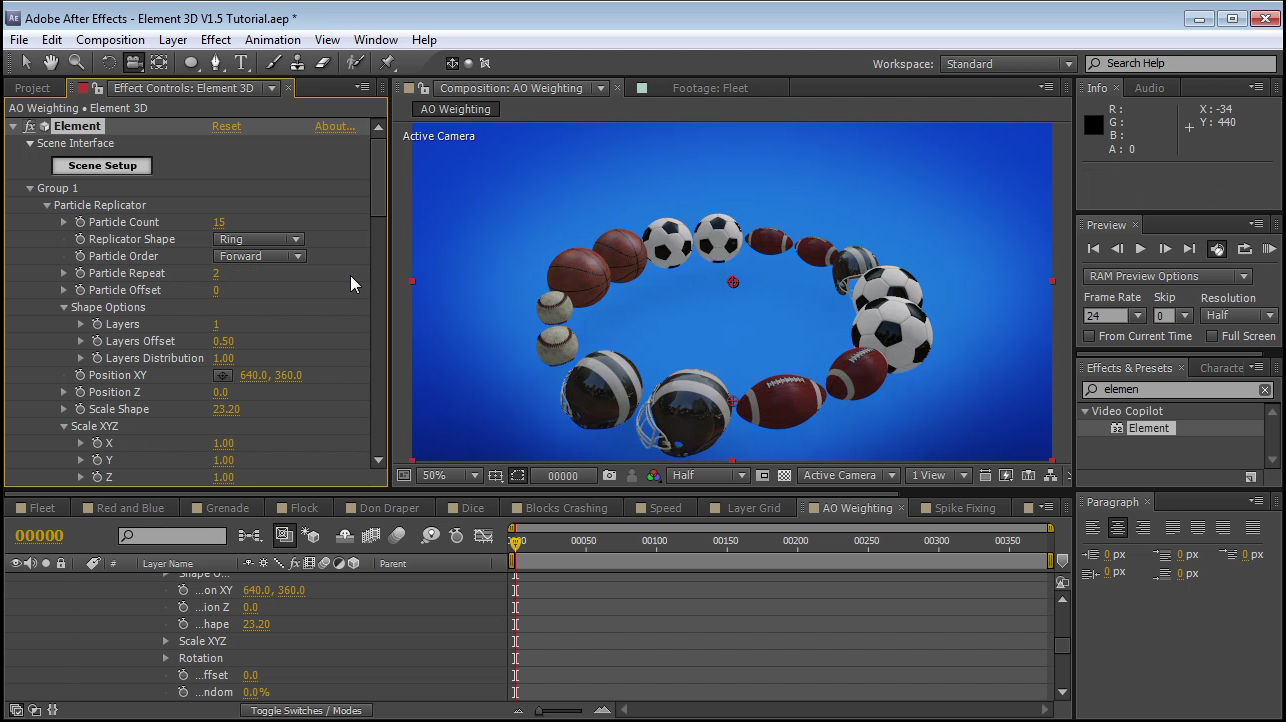
<figure><img src="https://2307539615-files.gitbook.io/~/files/v0/b/gitbook-x-prod.appspot.com/o/spaces%2FVXPIT6wWK7VeTYMAHNYe%2Fuploads%2F0P4VffJ0dHhGG5zILdHr%2Ffog_taper.jpg?alt=media&#x26;token=14db827a-8be5-4fb4-8c0a-4ee6046858dc" alt=""><figcaption></figcaption></figure>

### Ambient Occlusion

Ambient Occlusion Weighting\
AO amount: choose how much this material reacts to the main ambient occlusion settings.

<figure><img src="https://2307539615-files.gitbook.io/~/files/v0/b/gitbook-x-prod.appspot.com/o/spaces%2FVXPIT6wWK7VeTYMAHNYe%2Fuploads%2FgdVZbIyA24bxSOsILrYy%2Fao_amount.jpg?alt=media&#x26;token=043f1424-2000-4b5d-883e-bd1d9cfcff17" alt=""><figcaption></figcaption></figure>

### Render Modes

Full Render: All user defined setting are kept at what they are set to and at final quality\
Preview: Turns off some of the more intensive render settings so it is at a more comfortable temporary working performance speed.\
Draft: Turns off many features for fast temporary previews for animating.

<figure><img src="https://2307539615-files.gitbook.io/~/files/v0/b/gitbook-x-prod.appspot.com/o/spaces%2FVXPIT6wWK7VeTYMAHNYe%2Fuploads%2FEhyvLGUSwC4J6whBtIer%2Fss_template.jpg?alt=media&#x26;token=b9921339-6b49-4212-91d9-5bac8faca03d" alt=""><figcaption></figcaption></figure>

### Group Opacity

Force Opacity: Control a single group's forced opacity.

<figure><img src="https://2307539615-files.gitbook.io/~/files/v0/b/gitbook-x-prod.appspot.com/o/spaces%2FVXPIT6wWK7VeTYMAHNYe%2Fuploads%2F821LQF6eQwKF1vWnmpfB%2Fgroup_opacity.jpg?alt=media&#x26;token=30ebf51e-a51e-4e98-82cb-c40a81b860cb" alt=""><figcaption></figcaption></figure>

### UI Functionality/Hotkeys:&#x20;

Solo Material: Hold alt and click on the material button.

<figure><img src="https://2307539615-files.gitbook.io/~/files/v0/b/gitbook-x-prod.appspot.com/o/spaces%2FVXPIT6wWK7VeTYMAHNYe%2Fuploads%2Ff5qqFkp7x6JRyQa7J6Z6%2Fsolo_material.jpg?alt=media&#x26;token=2289debc-3ca8-4db3-8087-5e78682a37b4" alt=""><figcaption></figcaption></figure>

Switch Object Group Number: Hold Alt and click on the group the number and this will switch the to the selected group number rather than selecting two.

<figure><img src="https://2307539615-files.gitbook.io/~/files/v0/b/gitbook-x-prod.appspot.com/o/spaces%2FVXPIT6wWK7VeTYMAHNYe%2Fuploads%2FB20JMYdrOfj9errunInL%2Fgroup_number.jpg?alt=media&#x26;token=5b48a405-684e-488b-ae2d-35ca6242fbff" alt=""><figcaption></figcaption></figure>

Auto normalize scale tab: Uncheck to turn off normalize scale for future models.

<figure><img src="https://2307539615-files.gitbook.io/~/files/v0/b/gitbook-x-prod.appspot.com/o/spaces%2FVXPIT6wWK7VeTYMAHNYe%2Fuploads%2FEnEl55RQCfK7dfgTtS5X%2Fauto_normalize.jpg?alt=media&#x26;token=b8c7ccdb-0cd2-4bb6-bea2-aa100a5ea897" alt=""><figcaption></figcaption></figure>

### Replicator Shape

Layer Grid: This will use a layer shape to use as a particle replicator shape. Under Shape Options you can choose in the custom Layer dropdown what layer to use as the shape the particles will fill in.

<figure><img src="https://2307539615-files.gitbook.io/~/files/v0/b/gitbook-x-prod.appspot.com/o/spaces%2FVXPIT6wWK7VeTYMAHNYe%2Fuploads%2FeHKru2gCPrWXTR0iP2Nw%2Flayer_grid.jpg?alt=media&#x26;token=c6cd7e57-c408-466e-8402-bcb3edbc35dc" alt=""><figcaption></figcaption></figure>

### Text

Spike filter: If your text is having issues with undesirable spiking geometry, sometimes this is an issue with how the font is drawn. In some cases you can try increasing Spike Filer value and it will try to rid those spikes on the extrusion. You may also want to play with the path expand, possible adjusting it to a negative value in some cases, and this may get your extrusions looking nicer.

<figure><img src="https://2307539615-files.gitbook.io/~/files/v0/b/gitbook-x-prod.appspot.com/o/spaces%2FVXPIT6wWK7VeTYMAHNYe%2Fuploads%2FlnKO2xRCZwm0j7b05JoZ%2Fspike_and_expand.jpg?alt=media&#x26;token=8e8b1a1e-93a0-4f2d-9dd0-e4d0e252af8a" alt=""><figcaption></figcaption></figure>

Separate Objects: Allows each character or mask segment to be a separate object when using the multi-object feature. This is on by default.

<figure><img src="https://2307539615-files.gitbook.io/~/files/v0/b/gitbook-x-prod.appspot.com/o/spaces%2FVXPIT6wWK7VeTYMAHNYe%2Fuploads%2Fki7zJL6pt7NYCzFmvo6p%2Fseparate_objects.jpg?alt=media&#x26;token=ee9605b2-9f27-438d-bde4-0c15aa37603e" alt=""><figcaption></figcaption></figure>

### Separation Modes

By Bounding Box: This separates each piece by the mask's bound box. This mode is faster, but less accurate. Sometimes if two characters are too close to each other, they will be grouped as one object.

By Geometry: If it is the case that your characters are too close together to use the By Bounding Box option, you can use this and it will make sure that your pieces are separated by separate geometry. More accurate than By Bounding Box, but can be a little slower.

<figure><img src="https://2307539615-files.gitbook.io/~/files/v0/b/gitbook-x-prod.appspot.com/o/spaces%2FVXPIT6wWK7VeTYMAHNYe%2Fuploads%2FykkS4bK0qR5x8LKN24YE%2Fseparation_mode.jpg?alt=media&#x26;token=04a9fe01-0736-423a-b526-17d3a46a18d1" alt=""><figcaption></figcaption></figure>

### Particle Replicator

Particle Order: Choose how you particles are laid out in a particular replicator shape\
Random: Randomly orders how the particle's positions are laid out\
Forward: Loops the particle order sequentially (as relating to the order from top to bottom in the scene interface)\
Backward: Loops the particle order sequentially in reverse (as relating to the order from bottom to top in the scene interface)\
Mirror: Loops the particle order forward then backward

<figure><img src="https://2307539615-files.gitbook.io/~/files/v0/b/gitbook-x-prod.appspot.com/o/spaces%2FVXPIT6wWK7VeTYMAHNYe%2Fuploads%2F0Kmue3tDxtsRowY0pGYl%2Fparticle_repeat.jpg?alt=media&#x26;token=6664264c-cb25-47eb-9016-6a5e913a6656" alt=""><figcaption></figcaption></figure>

Particle repeat: Choose the amount that each particle will repeat

<figure><img src="https://2307539615-files.gitbook.io/~/files/v0/b/gitbook-x-prod.appspot.com/o/spaces%2FVXPIT6wWK7VeTYMAHNYe%2Fuploads%2FiDzJfQ9YI7kKVErzmCRx%2Fparticle_order.jpg?alt=media&#x26;token=6bd4a5d5-8111-4fe1-89d7-3a14fd972690" alt=""><figcaption></figcaption></figure>
